
Quick answer: Bird spikes for ledges are sized to cover the birds’ usable landing area continuously, including changes in depth, corners and interruptions. Measure the ledge before ordering, check the surface and drainage, then follow the spike manufacturer’s fixing instructions. A narrow strip that leaves a clear landing space beside it is unlikely to solve the problem.
Start with the ledge, not the product
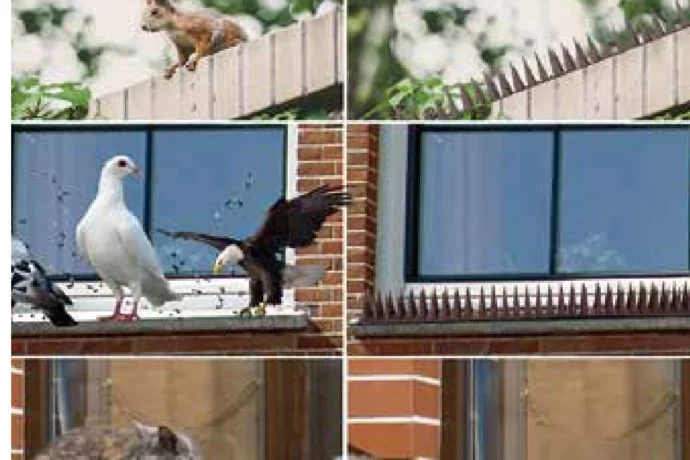
Bird spikes are a form of physical exclusion for narrow perching surfaces. They can suit parapets, sign tops, window ledges and similar edges when birds repeatedly land on a defined strip. They are not a universal solution for a broad roof, open courtyard or an area where birds can simply move a short distance away. For a larger area, compare other proofing options and have the site assessed.
Before measuring, note where birds land, where they enter, and whether food, standing water, shelter or an existing nest is drawing them in. Addressing an attractant can make any deterrent more effective. If a nest is present, pause work and check local wildlife rules before disturbing it.
How to measure a ledge for bird spikes
- Measure the full length. Record each straight run separately. Include short returns around corners and note gaps created by signs, brackets, downpipes or other fixtures.
- Measure the usable depth. Take the measurement from the outside edge to the wall or obstruction. Check whether the surface is flat, sloped, rounded or capped, because the profile affects how a strip can sit.
- Mark changes in level. Split stepped or curved ledges into sections. A single overall length can hide places where a strip cannot sit flat or where birds can land between sections.
- Record the fixing surface. Identify the material and its condition: for example, sound masonry, painted metal, tile or a fragile finish. Look for loose coatings, cracks and water paths before choosing an attachment method.
- Check the working environment. Note exposure to rain, coastal air, cleaning chemicals and temperature changes. Ask the supplier which product and fixings suit those conditions.
A simple sketch with lengths, depths, corners and obstacles is useful for installers and suppliers. Photograph the ledge from above and from the side so the profile is clear. Do not estimate from a distant ground-level photograph when an accurate fit matters.
Plan complete coverage without blocking the building
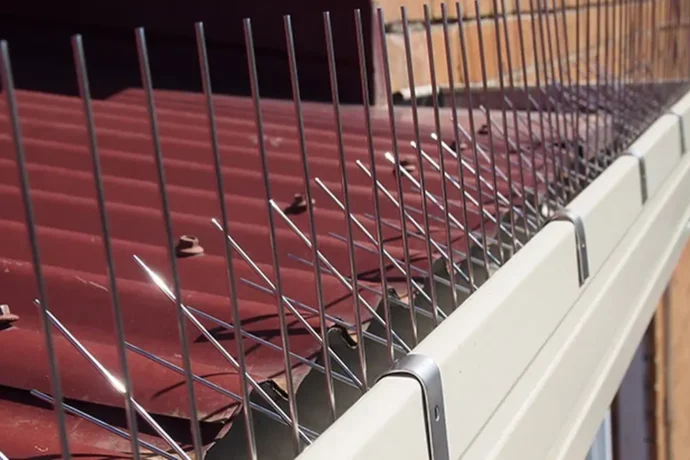
Coverage has two dimensions: the run along the ledge and the strip across its depth. The deterrent needs to occupy the landing zone where birds actually settle. If the strip covers only one side of a wide cap, birds may still use the uncovered side. If a corner, bracket or end section is left open, it may become the new preferred perch.
Use the selected product’s stated coverage width and installation guide to plan the layout. Where the ledge is deeper than one strip can cover, ask whether more than one row is suitable or whether another system is a better fit. Avoid overlapping pieces or leaving an unintended channel unless the manufacturer’s instructions call for it.
Keep drainage outlets, expansion joints, access panels and maintenance routes clear. Do not bridge a drain or seal a joint just to make the layout look continuous. On a historic facade, waterproofing membrane or delicate finish, get approval from the building owner or a qualified installer before fixing anything.
Choose a fixing method for the actual surface
Adhesive, screws and other fixing systems are not interchangeable. The correct method depends on the product base, substrate, coating, weather exposure and the consequences of water penetration. Follow the supplier’s instructions for surface preparation, curing time, temperature and fastener spacing. If the surface is dusty, damp, crumbling or freshly painted, stop and resolve that condition first.
For high ledges or public areas, use a qualified installer with suitable fall protection and access equipment. Never lean out of a window or climb onto an unstable roof to take measurements. A lower material cost is not worth an unsafe installation or damage to the building envelope.
Inspect the result and adjust early
After installation, check that strips remain secure, the intended landing areas are covered, and water still drains freely. Recheck after severe weather and during routine building maintenance. Look for displaced sections, debris, loose fasteners and any new landing spot beside the treated area. If birds shift to another accessible surface, reassess the whole route rather than adding isolated pieces at random.
Frequently asked questions
Do bird spikes work on every ledge?
They are best suited to defined perching strips that can be covered as the product requires. Broad surfaces, ledges with many obstructions, or sites with active nesting may need a different plan.
Should I cover only the front edge?
Not automatically. Measure the usable depth and observe where birds land. Follow the product’s coverage guidance so an uncovered landing strip is not left behind.
Can I install bird spikes on a roof ledge myself?
Only if the work is safely accessible and the fixing method is appropriate for the surface. High or fragile locations should be handled by a qualified installer.
For product dimensions and available options, see our bird spikes range and the 304 stainless steel bird spikes page. For a step-by-step overview of site preparation, read our bird spike installation guide. Always confirm dimensions and fixing compatibility for your specific ledge.
Topic cluster: Bird Spike Installation & Maintenance
Related bird control guides
- How to Install Bird Spikes (Roof, AC, Solar)
- Bird Spike Maintenance: Wind, Rain and Weather Checks
- Why Bird Spikes Matter: Safer, Cleaner Building Protection
Browse stainless steel and PVC bird spikes · View the full Bird Control Guide Library
Related guides: mailbox spike coverage.


Leave a comment